Specialized Nursing Care
Subtopic:
Bandaging
Table of Contents
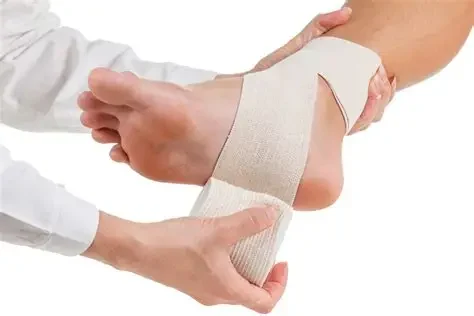
Bandaging
Bandaging: Material for Support and Immobilization
Bandaging involves using gauze or cloth to support, hold, or immobilize body parts. It’s the technique of applying roller bandages to different body areas.
Purposes of Bandaging:
Bleeding Control: To apply pressure and help stop bleeding.
Immobilization: To restrict movement of sprained or fractured limbs.
Splint Securement: To hold splints in place for fractures.
Wound Protection: To shield open wounds from dirt and contaminants.
Support for Circulation Issues: To provide support for conditions like varicose veins or poor circulation.
Swelling Reduction: To apply compression and minimize swelling.
Types of bandages
There are three main types of bandages:
Triangular Bandages
Roller Bandages
Tubular Bandages
1. Triangular bandages
Made of cloth.
Commonly used as arm slings.
Used to secure dressings and immobilize injured limbs.
Can be unfolded to create scalp bandages.
Modifications:
Broad Fold Bandage: (Explanation not provided in original text, but broadly used for arm slings and larger areas).
Narrow Fold Bandages: Used for ankle and foot immobilization. Also to secure dressings on limbs.
2. Roller bandages
Made of cotton gauze or linen.
Secured with pins, clips, tape, or by tying knots.
Uses:
To keep dressings in place.
To apply pressure to control bleeding.
To support sprains and strains, reducing pain.
Types of Roller bandages:
Crepe Bandages:
Provide firm support to injured joints.
Secure dressings firmly over wounds.
Allow good air circulation.
Open Weave Bandages:
Used for holding light dressings.
Permit ventilation due to their loose weave.
Do not provide pressure or strong joint support.
Conforming Bandages:
Secure dressings, especially on fingers and toes.
Provide support to digit joints.
3. Tubular Bandage:
Seamless, tubular fabric rolls.
Elasticized versions support joints like elbows or ankles.
Tubular gauze bandages use a special applicator.
Suitable for securing dressings on fingers or toes, but not for bleeding control.
Method for Tubular Gauze Bandage (Finger):
Cut a piece of tubular gauze ~2.5 times the finger’s length. Load it onto the applicator. Slide applicator over finger and dressing.
Hold gauze end, pull applicator beyond fingertip, leaving a gauze layer. Twist applicator twice to seal end.
Hold gauze base, push applicator back to apply a second layer. Remove applicator.
Secure gauze base with non-encircling adhesive tape. Check circulation every 10 minutes (finger warmth/tingling). Loosen if circulation is impaired.
Characteristics of an ideal bandage
Elasticity (moderate): Should stretch but not be overly elastic.
Perforated: Well-ventilated to allow air to reach the wound area.
Cotton Material: For good absorbency.
Sufficient Length: Long enough to provide adequate support or immobilization.
Non-Adhesive: Bandages are applied over dressings, not directly to wounds.
NOTE: Bandages are applied over dressings, not directly on wounds.
General principles of bandaging
Rolled Bandage: Use a tightly rolled bandage of appropriate width. Maintain roll tightness.
Patient Facing: Face the patient when bandaging limbs (except for head bandages).
Bandage Head Position: Hold the bandage head uppermost.
Hand Use: Hold bandage in right hand for left limb, and vice versa.
Bandaging Direction: Bandage from inside outwards and from below upwards, maintaining even pressure.
Start Securely: Begin with a secure turn. Overlap each turn by 2/3 of the previous one.
Tension: Ensure bandage is neither too tight nor too loose.
Finishing: End with a straight turn, fold in the end, and secure, avoiding joints and injury sites.
Fastening: Use safety pins or bandage fasteners.
Tape for Specific Patients: Use tape instead of pins for pediatric or mentally handicapped patients.
General principles of bandaging
Before Applying a Bandage:
(a) Reassurance: Reassure and explain the procedure.
(b) Patient Comfort: Position patient comfortably (lying or sitting), convenient for the first aider.
(c) Support & Elevation: Support the injured part and elevate if needed.
When Applying a Bandage:
(a) Positioning: Stand in front of the patient, except for scalp bandaging.
(b) Passing Bandages: If patient is lying, pass bandages under natural body hollows (ankles, knees, neck, etc.).
(c) Firmness: Apply firmly enough to control bleeding and secure dressings, but not so tight as to restrict circulation.
(d) Expose Extremities: Leave fingers and toes exposed to monitor circulation.
(e) Knot Tying: Use reef knots. Avoid tying over injured parts or bony areas.
When Bandaging for Immobilization:
(a) Padding: Pad between limbs and body or between legs with cloth or folded cotton/towels.
(b) Knot Placement: Tie knots in front of the body or at the midline if sites are injured.
After Bandaging:
(a) Circulation Check: Check circulation every 10 minutes.
(b) Patient Comfort: Ask about discomfort caused by the bandage.
NOTE: Always prioritize infection prevention and control.
Signs of impaired circulation
Extremity Appearance: Pale, cold, later bluish skin (cyanosis).
Sensory Changes: Tingling and numbness.
Movement Limitation: Inability to move the affected limb.
Swelling.
How to check for circulation
Press a fingernail or toenail or skin until it turns pale. Release pressure. Pink color should return quickly. If it remains pale, the bandage is too tight. Loosen it until pink color returns and warmth is felt.
Bandaging Techniques and Patterns
1. Circular Method
Each bandage turn completely covers the previous one.
Used for ankle bandaging or securing dressings.
2. Spiral Method
Each turn partially overlaps the previous one.
Applied to straight body parts or those with increasing circumference.
Can be used for ear bandaging.
3. Spiral Reverse
Bandage is anchored, then reversed direction halfway through each spiral turn.
Used for body parts with increasing circumference, like upper arm and leg.
4. Figure of Eight (8)
Anchored below a joint, then alternating ascending and descending turns forming a figure 8.
Used around joints.
5. Recurrent Method
Combines recurrent and circular turns.
Hold bandage during recurrent turns, then use circular turns to anchor.
Used for scalp and stump bandaging.
6. Triangular Bandaging
Used on the shoulder for injuries and clavicle fractures.
Can be used as an arm sling, and in emergencies, on any body part.
(a) Arm Sling
Supports forearm in slightly raised or horizontal position.
For upper arm, wrist, or forearm injuries when elbow can bend.
Or to immobilize arm for rib fractures.
Procedure:
Support injured arm, hand slightly higher than elbow.
Fold base of bandage to hem.
Place bandage base parallel to body.
Slide upper end under injured arm, around neck to opposite shoulder.
Fold lower end over forearm to meet upper end at shoulder.
Tie reef knot at hollow above clavicle on injured side. Tuck free ends under knot for padding.
Hold point beyond elbow, twist until fabric fits elbow, tuck in, or use safety pin to fasten.
Check finger circulation immediately and every 10 minutes.
(b) Elevation Sling
Supports forearm and hand in raised position, fingertips touching shoulder.
Controls bleeding from forearm wounds and minimizes swelling.
Supports arm in case of hand injury.
Management:
Patient places hand across chest, fingers on opposite shoulder.
Place bandage over body, one end over shoulder on injured side.
Hold point just beyond elbow.
Patient extends injured arm slightly from chest while you bring bandage diagonally across back to meet other end at shoulder.
Tie reef knot at hollow above clavicle, tuck ends under knot.
Twist point to fit elbow closely. Tuck in point above elbow and secure.
Check circulation, loosen and reapply if needed.
Haemorrhage (Bleeding)
Definition
Haemorrhage: Blood loss from vessels.
It can be internal or external, ranging from mild to severe.
Mild Haemorrhage: From injured capillaries, slow oozing flow.
Severe Haemorrhage: From arteries or veins, forceful blood expulsion due to higher pressure, especially in arteries.
Classifications of Haemorrhage
1. By Time of Occurrence
Primary Haemorrhage: Occurs immediately at the time of injury.
Reactionary Haemorrhage: Occurs within 24 hours of injury, often as shock resolves and blood pressure rises.
Secondary Haemorrhage: Occurs after 48 hours, usually due to infection or sepsis.
2. By Vessel Injured (Source)
Arterial Haemorrhage:
Arteries carry oxygenated blood from the heart.
Blood is bright red, under high pressure, spurting out.
Venous Haemorrhage:
Veins carry deoxygenated blood back to the heart.
Blood is purplish-red, less oxygenated, steady flow.
Capillary Bleeding:
Smallest vessels.
Blood oozes slowly, dark red, most common type.
3. By Site of Injury
External Haemorrhage: Bleeding is visible or can be seen.
Internal Haemorrhage: Bleeding is hidden or concealed.
Internal abdominal bleeding (peritoneal) is dangerous and difficult to stop.
Haemoptysis: Blood coughed up from lungs.
Haematemesis: Blood vomited from stomach; dark red, coffee-ground like (stomach ulcer).
Haematuria: Blood in urine, smoky or blood-stained (kidney/bladder injury).
Melaena: Dark, tarry stools (upper intestine bleeding).
Fresh, Bright Red Stools: Lower bowel bleeding.
Vaginal Bleeding: Menstruation, miscarriage, or injury.
Suspect internal bleeding after severe injury or shock without visible blood loss.
Clotting Mechanism
Body’s natural process to stop bleeding:
Platelet Aggregation: Platelets gather at injury site, forming a plug.
Clotting Factors: Released, converting fibrinogen (blood protein) to fibrin.
Fibrin Mesh: Fibrin forms a mesh across the vessel cut, trapping platelets and blood cells.
Clot Formation: Mesh shrinks, serum oozes out, leaving solid clot covering the wound.
General Management of Haemorrhage
Aim: Stop bleeding quickly and seek medical help.
Steps:
Patient Position: Suitable position (sitting or lying) based on injury type/site.
Elevation: Elevate bleeding part, support if not fractured.
Exposure: Expose wound by removing minimal clothing.
Clot Preservation: Do not disturb formed clots.
Foreign Body Removal: Remove visible, easily removable foreign bodies.
Pressure Application: Apply and maintain direct pressure.
Dressing/Bandage: Apply dressing or bandage to secure pressure.
Immobilization: Immobilize injured part.
Hospital Transfer: Transport to hospital ASAP.
Controlling Haemorrhage
Principle: Reduce blood flow to wound and promote clotting. Achieved via pressure and elevation.
Direct Pressure
Apply pressure directly onto the wound.
If foreign body or bone protrusion is present, apply pressure around it for 5-15 minutes.
Cover wound with clean cloth if needed.
Secure dressing with bandage, firm but not circulation-cutting.
Indirect Pressure
Used if direct pressure fails or is impossible.
Apply pressure at pressure point between heart and wound on the supplying artery.
Prolonged indirect pressure can risk limb viability due to oxygen deprivation.
Key Pressure Points:
Brachial Artery: Upper limb (arm).
Femoral Artery: Lower limb (leg).
Signs and Symptoms of Internal Bleeding
History: Recent injury or medical condition.
Pain/Tenderness: At affected site, potential swelling.
Shock Signs:
Pallor (paleness of mucous membranes).
Rapid, weak pulse.
Shallow breathing.
Restlessness.
Thirst (if conscious).
Low body temperature.
Vomiting.
Cold extremities.
Blood may appear from mouth, eventual unconsciousness.
Arresting Haemorrhage from Special Sites
1. Scalp Wound
Signs and Symptoms:
Pain, tenderness, bleeding.
Swelling around wound.
Possible skull fracture signs: nose bleeding.
Unconsciousness.
Aim of Treatment:
Control bleeding quickly, hospital transport to rule out head injury.
Direct pressure, sterile/clean cloth, bandage firmly.
Check breathing, pulse, responsiveness.
2. Epistaxis (Nose Bleeding)
Aim of Treatment:
Prevent blood inhalation, safeguard breathing.
Patient Position: Sit, head slightly forward.
Loosen clothing around neck.
Nasal Pinching: Pinch soft part of nose.
Avoid activities: No talking, swallowing, coughing.
Seek medical help if bleeding lasts >30 mins or recurs.
3. Bleeding from the Mouth
Aims of Treatment:
Safeguard airway, prevent blood inhalation, control bleeding.
What to Do:
Patient Position: Sit, head tilted slightly to affected side.
Direct Pressure: Clean dressing over wound, patient applies pressure.
Tooth Socket: Thick gauze pad over socket, patient bites down.
Avoid mouth rinsing or hot drinks.
Refer for medical/dental aid if bleeding persists.
Causes of Haemorrhage
Trauma/Injury:
Direct: Vessel injury, neighboring tissue damage (accident, surgery, wounds).
Indirect: Fractures (skull) causing vessel damage.
Labour:
Ruptured fallopian tube (ectopic pregnancy).
Obstetric: Placenta separation causing bleeding.
Blood Vessel Abnormalities:
Neoplasm (Tumors): Cancer cells destroying vessels.
Haemorrhoids: Rectal vessels.
Atheroma: Arterial wall thickening, rupture.
Aneurysm: Arterial dilation, rupture due to pressure on weak tissues.
Blood Diseases:
Haemophilia: Genetic coagulation disorder, repeated haemorrhage (epistaxis, rectal, haematuria).
Menstruation: Monthly blood loss in females (12-45 years).
Intestinal Tract Diseases: Peptic ulcers, typhoid, dysentery, ulcerative colitis, blood loss.
Hypertension: High blood pressure, cerebral vascular accidents (stroke).
General Signs and Symptoms of Haemorrhage
Pale face and lips.
Cold, clammy skin.
Dizziness, fainting.
Rapid, weak pulse.
Shallow, yawning breathing.
Decreased blood pressure.
Low temperature.
Blurred vision.
Thirst.
Low blood volume.
Sighing and yawning.
Oliguria (low urine output).
Feeling unwell, anxious.
Related Topics
- Wound dressing
- Colostomy Care
- Abdominal Paracentesis(Abdominal Tapping)
- Vulva Toilet/ Swabbing
- Oxygen Administration
- Lumbar Puncture
- Nasogastric tube to feed patients
- Gastrostomy Feeding
- Gastric Lavage
- Catheterization
- Tracheostomy Care
- Caring for patients in traction
- Prepare for application of orthopaedic splints
- Bandaging
- Nursing Process
- Take History of the patient
- Perform a physical examination of the Patient
- Making a Nursing Care Plan
- Admission of a patient
- Drug administration
- Transfer Patients
- Discharge of patients
- Last Office
We are a supportive platform dedicated to empowering student nurses and midwives through quality educational resources, career guidance, and a vibrant community. Join us to connect, learn, and grow in your healthcare journey
Quick Links
Our Courses
Legal / Policies
Get in Touch
(+256) 790 036 252
(+256) 748 324 644
Info@nursesonlinediscussion.com
Kampala ,Uganda
© 2026 Nurses online discussion. All Rights Reserved